
If you record music, you’ve probably heard something about stereo mic techniques for recording.
You’ve also likely seen discussions on phase issues, XY patterns, mid-side techniques, and many other potentially confusing terms and acronyms.
I want to help you understand stereo mic’ing. It’s not as confusing as it may seem at first, and it can be a very helpful tool for your recording studio.
However, there are lots of things to consider, and some potential issues to watch out for.
So let’s dive right in, shall we?
What are stereo mic techniques anyway?
A stereo mic technique is a method of using two microphones to record a single source.
This type of technique is commonly used on instruments such as drums, acoustic guitar, acoustic piano, sometimes electric guitars, and large bands, orchestras, or choirs.
In fact, for larger sound sources like a choir, the recording engineer may use even more than two microphones. But for our discussion, we’re going to stick with two.
So why use stereo mic techniques?
There are two common reasons:
1. Increase the stereo width of your recording
When you use two microphones to record a source, those microphones are often positioned to pick up slightly different characteristics of the sound. Often, the two recorded tracks will be panned hard left and right in the mix in order to give some “spread”, allowing the single instrument to take up more space in the stereo spectrum.
2. Blend multiple sound sources together
Sometimes, two or more microphones are simply used to capture different characteristics of the source in order to blend them together in mono. This may not actually be considered a “stereo technique”, strictly speaking, but it is a valid way to use two microphones on a single source.
In some ways, stereo mic’ing can be a double-edged sword. Although it can add some nice stereo width, it can also cause some unique problems, such as phase issues (this is a big one – we’re gonna go into more detail on this soon).
Stereo mic’ing also adds more complexity. You need two microphones, and you’re recording two tracks instead of one. Furthermore, if too many tracks in your mix are already stereo, more stereo recordings can really muddy things up, and cause your mix to lose its clarity.
With all that in mind, stereo mic’ing can be a great tool in your recording arsenal. Let’s talk about a few of the most common (and most useful) techniques.
A/B
The A/B technique (also called “Spaced Pair”) is probably the simplest technique to understand and use. Simply take two microphones and place them in two different locations, usually a few feet away from each other.
This technique offers plenty of width and flexibility. It is a common technique for drum overheads, and even acoustic guitar.
But be careful! This one is very prone to phase issues. I promise we’re going to talk more about phase issues soon, but for now, just trust me: you don’t want them.
To avoid phase issues with the A/B technique, try to position the microphones so that they are both the same distance away from the source you’re recording. I typically have a measuring tape laying around in the studio for just this reason.
If you’re recording a drum set, position the mics the same distance away from the snare drum.
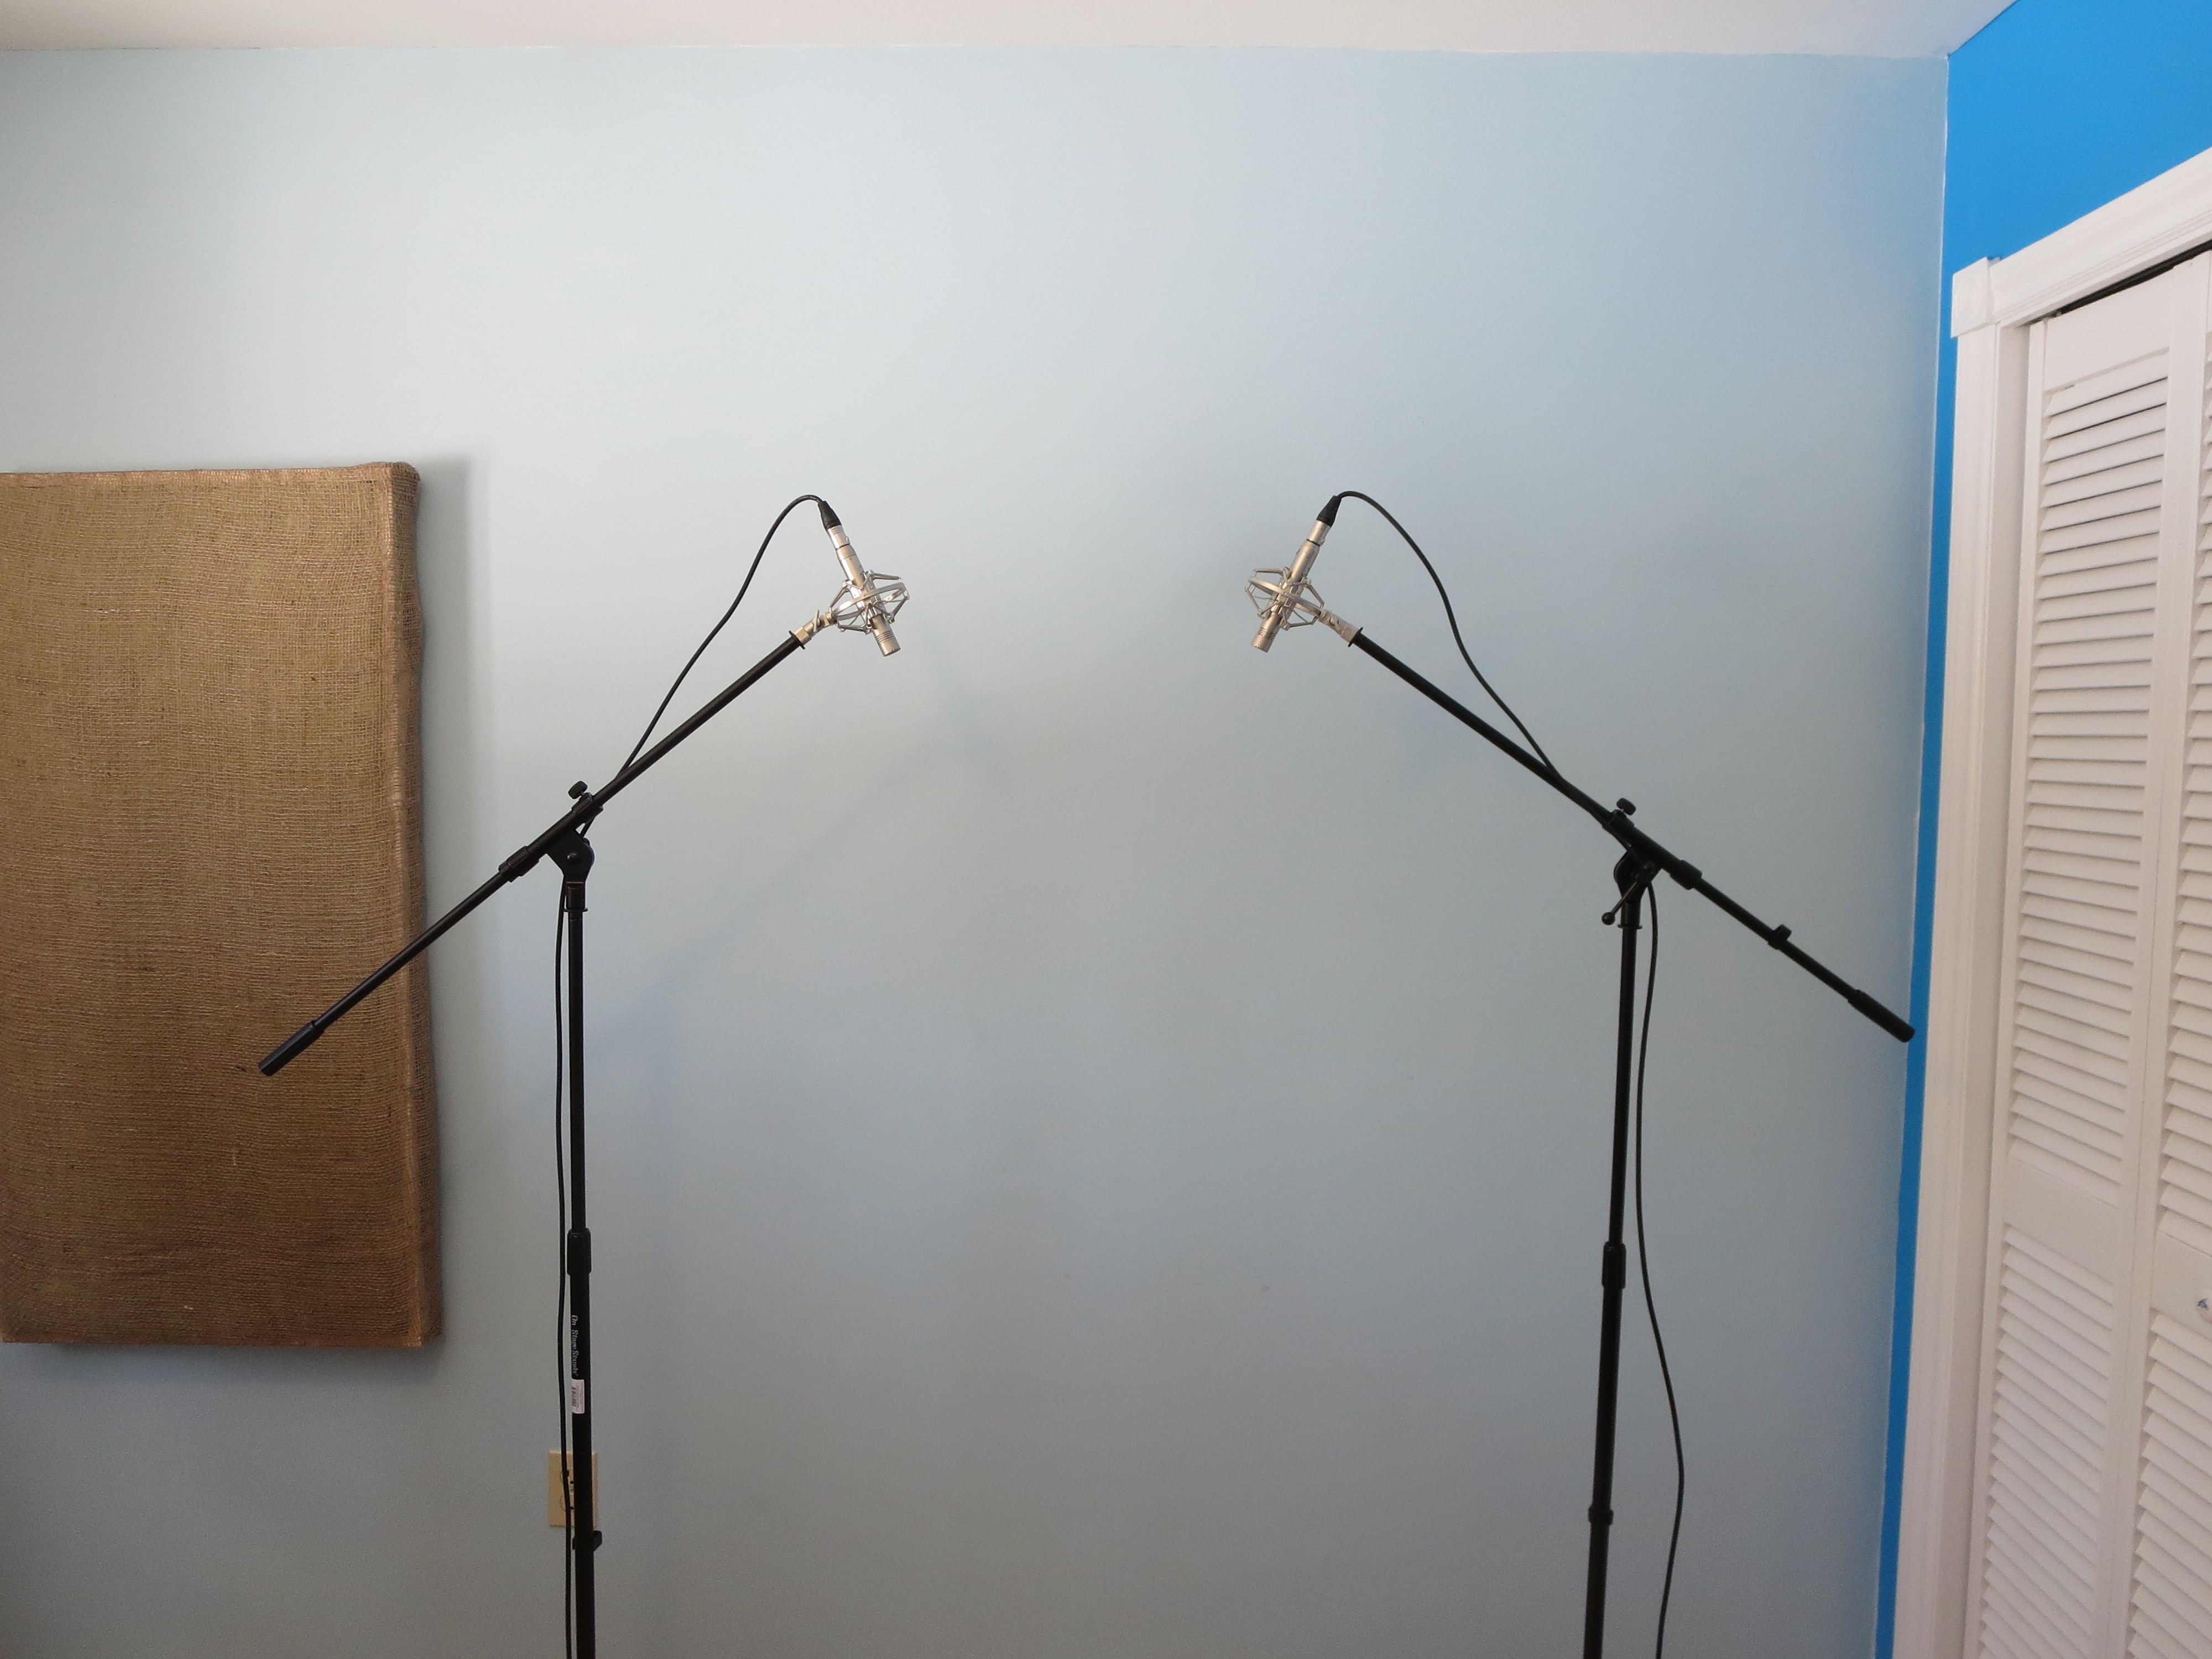
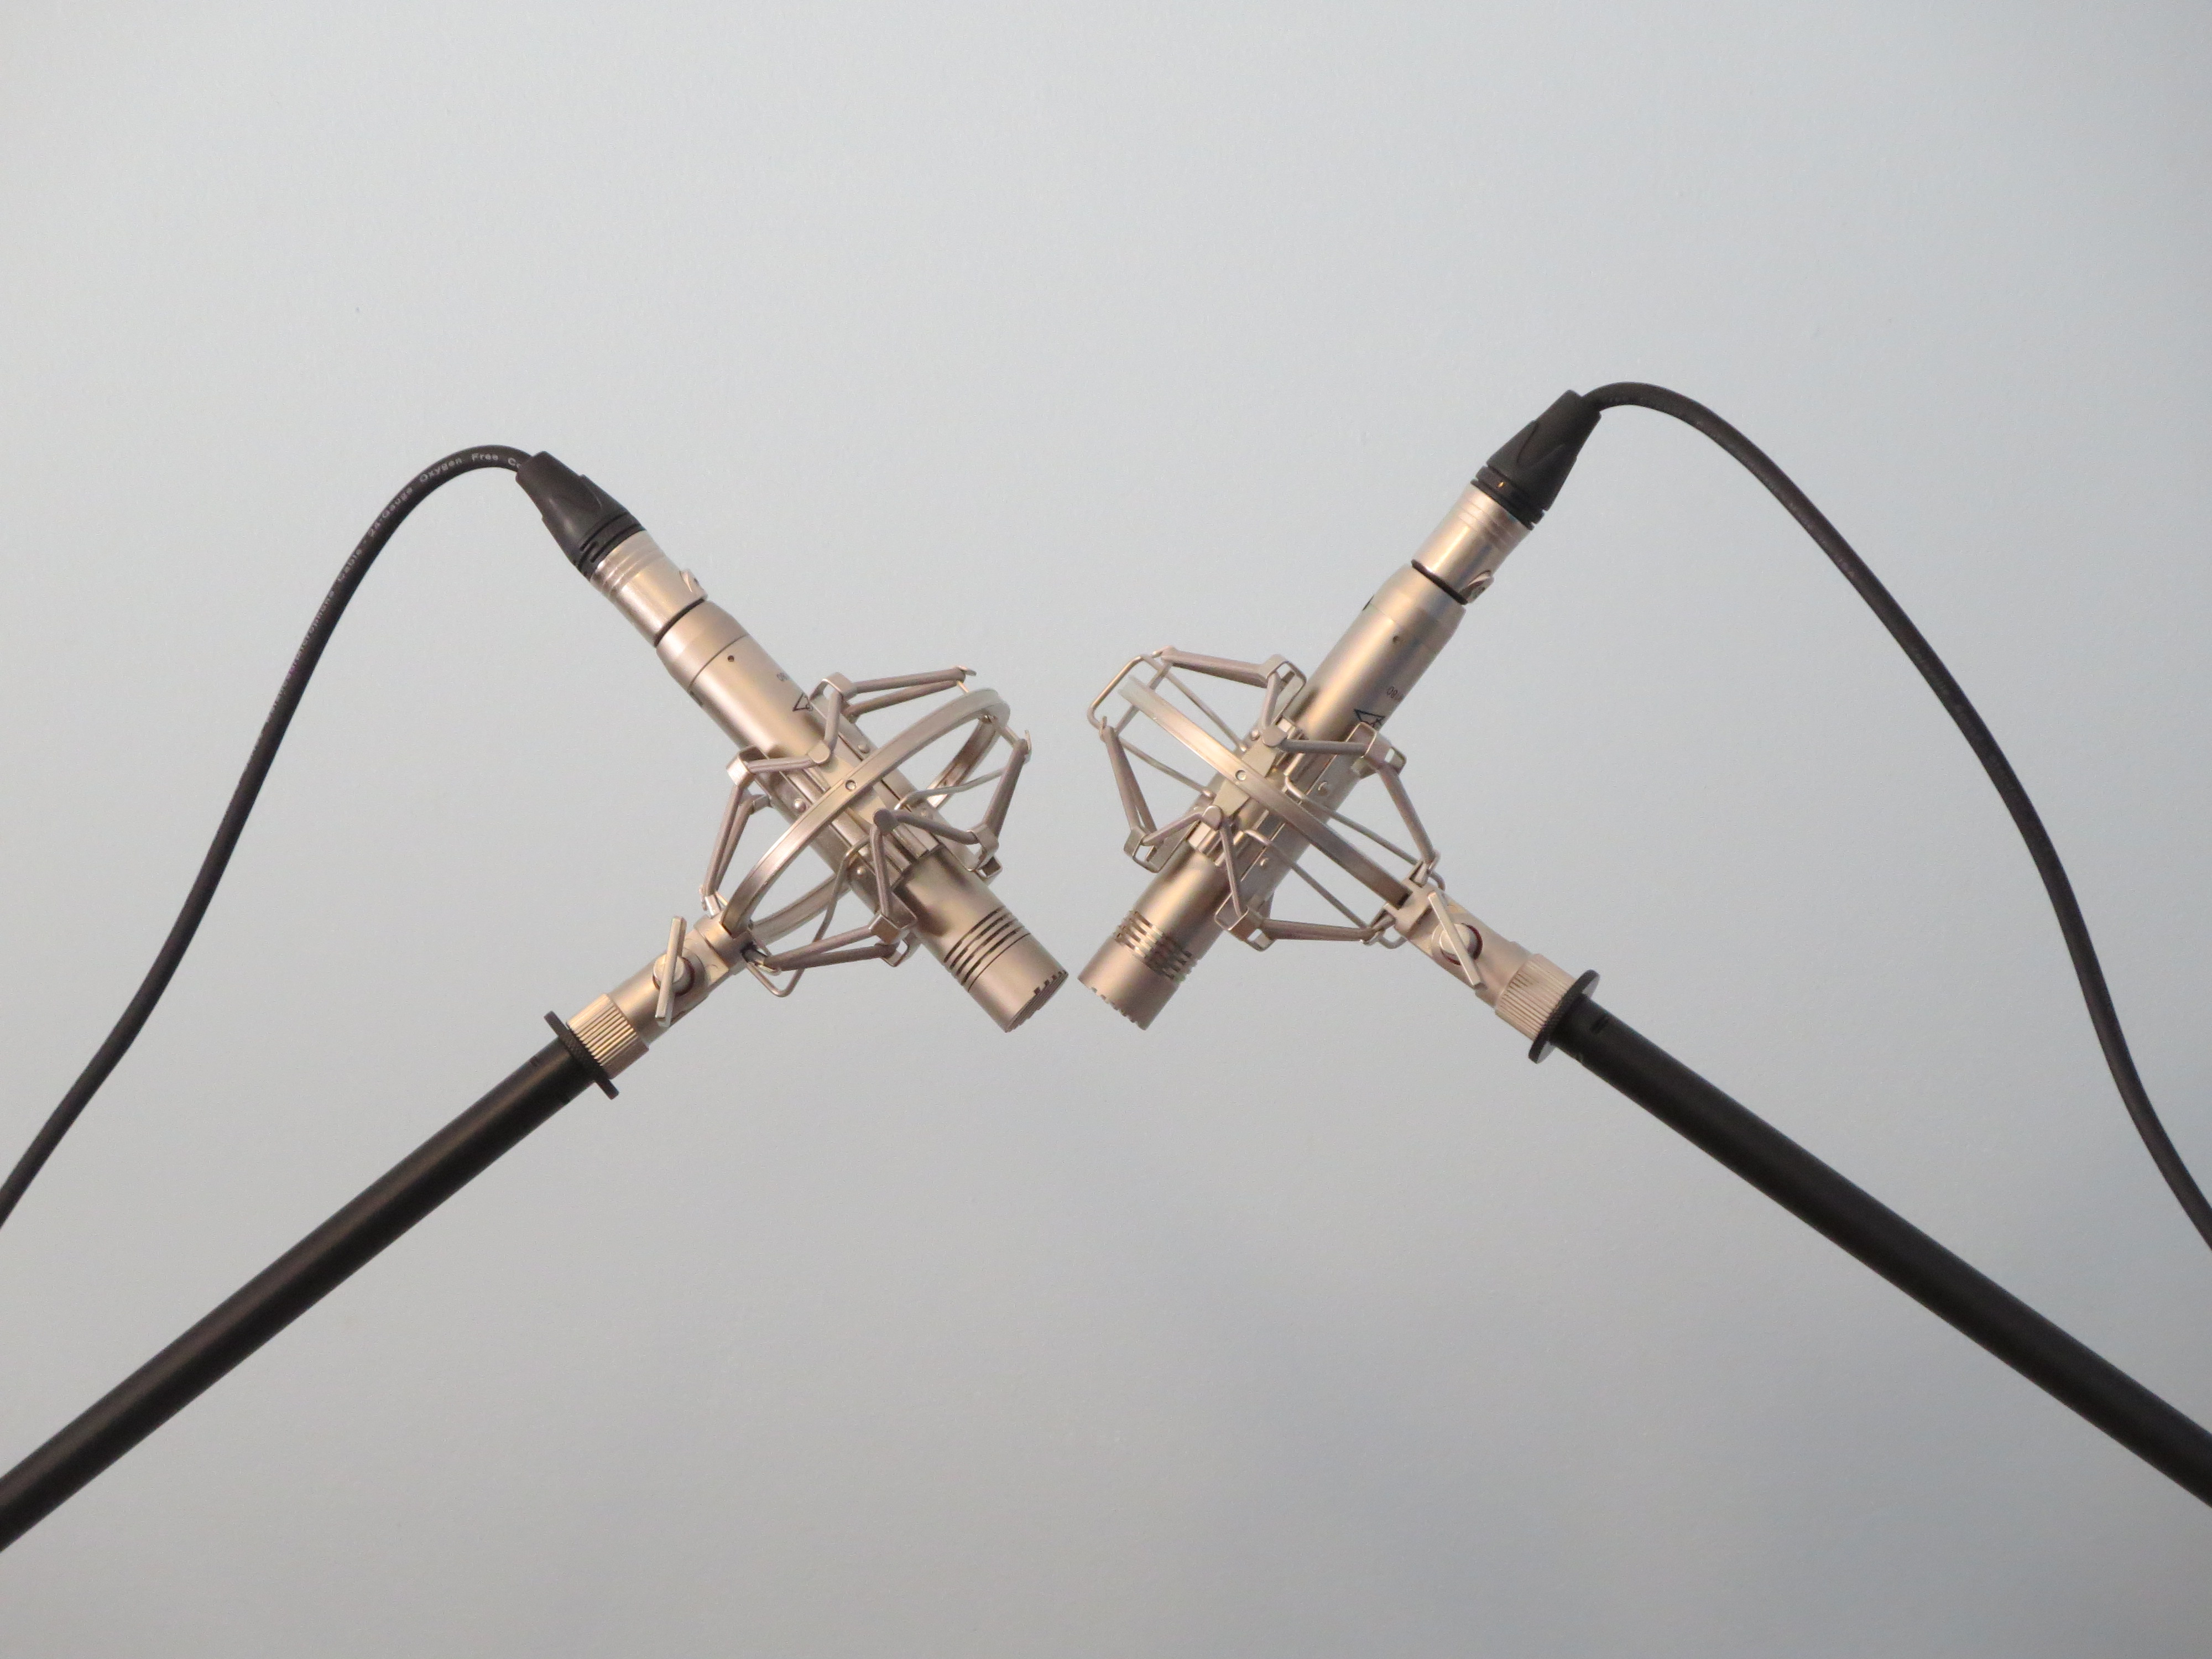
X/Y
The X/Y technique generally does not sound as wide as A/B, but its biggest benefit is that it is not as susceptible to phase issues.
Set up an X/Y pattern by positioning the heads of the two microphones right next to each other. Make sure that the microphones are pointing in perpendicular directions (i.e. a 90 degree angle between them).
This is a very common technique, and the one that I personally tend to use most often. It may not sound as wide, but the lack of phase issues makes the trade-off worth it.
ORTF

This is a funny technique that is very particular, and at first seems kind of arbitrary.
For this technique, you need to position the mic heads 17cm apart, pointing 110 degrees away from each other.
The point of this technique is to roughly simulate the position and direction of human ears. If the mics aren’t too close to the source, then you can avoid phase issues with this technique as well, since the mics are relatively close together.
Mid-Side (MS)
This technique requires a cardioid microphone and a bidirectional microphone.
The setup is as follows. Point the cardioid mic directly at the source. Place the bidirectional mic in the same position as the cardioid, but point the recording directions perpendicular to the cardioid, so that it is recording off to the sides.
This one also requires some processing after the recording is finished. It gets a little bit complicated, and I won’t get into the details here. If you’re interested, check out this resource on the Mid-Side mic technique. (TODO: link)
If you don’t have a bidirectional (or figure 8) microphone at your disposal, then this technique won’t be for you. Ribbon microphones are always bidirectional, and so they can be a good candidate for this type of technique.
If you’re confused by cardioid mics, bidirectional mics, and ribbon mics, I’ve got a great resource for you to help you understand your microphones better. Make sure to keep reading to the end for that.
Ok, so those are some good stereo mic techniques to try out. But what kinds of issues do we need to watch out for?
As promised, here’s the big one:
Phase Issues
Phase issues can get really technical. But here are the basics.
Whenever you have two microphones recording the same source, it’s possible that the sound will reach the two microphones at different times.
If the sound hits the two microphones at the same time, then the two recordings are in phase.
However, if they hit the microphones at different times, they may be out of phase.
When the recordings are out of phase, some weird things can happen. Each recording by itself will sound just fine. But when you mix them together, some of the audio frequencies will cancel each other out.
The audio may sound thin or unnatural.
The way to determine whether you have phase issues is to listen to one track or the other in solo, and then bring in the second track. Phase issues are more common in the lower frequencies, so if adding the second microphone causes the audio to get thinner and lose its low end, then you probably have phase issues.
Here are a few ways to deal with phase issues:
Decide whether it’s actually a problem
If you’re getting phase issues, often that will cause the audio to sound bad.
However, listen to it in the context of the mix. Is it a problem? Or does it blend in just fine?
Usually you will want to avoid phase issues, but this is a rule that can be broken. Use your ears.
Make sure the mics are the same distance from the source
Sound travels at a constant speed. So if the microphones are both the same distance from the source you’re recording, then the sound will hit both mics at the same time, thus eliminating any phase problems.
Makes sense right?
This is why techniques such as X/Y and ORTF have less potential phase problems. The microphones are closer together, so there is a better chance that they’re roughly the same distance from the source.
Use the 3-to-1 rule
This is a little rule worth mentioning.
When using two mics on a source, make sure that the second mic is three times as far away from the first mic as the first mic is from the source.
For example, if one microphone is a foot away from the source, make sure the second microphone is 3 feet away from the first microphone.
It’s a weird little rule. But it works. It’s especially helpful when using even more than two microphones.
Mixing Tricks
If you’ve recording two tracks that are out of phase, there are a few things you can do in mixing which may help.
First, try flipping the polarity on one of the tracks. This can be done using a gain or trim plugin. See if flipping the polarity of one of the tracks helps, or if it hurts.
Another thing to try is nudging the tracks so that they’re in phase. Zoom in on the audio, and slide one of them back or forward until you can see the audio waveforms lining up.
These things can help. But honestly, it’s best to just get the mics in the right place, and record without phase issues.
Conclusion
Whew! That was a lot of information.
Stereo mic techniques are really fun. They can give cool stereo width to your tracks, and are worth experimenting with.
Also, if you’re a little confused about the different types of microphones, as promised, I have a great resource for you.
It’s called Understanding Microphones.
In this video series, you’ll learn about the different types of microphones, their strengths and weaknesses, and how to wield them most effectively.
It’s a great little piece of training, for a ridiculously low price.
Go have a look over at understandingmicrophones.com. Your recordings will thank you.
So that’s all for now! Leave a comment below and let me know what you think!
